S-Curve is a popular technique to increase the Contrast of the photo. Compared to Contrast slider, create S-Curve in Tone Curve gives you more control.
The adjustment can be achieved by brightening up the Highlights and darken down the Shadows.
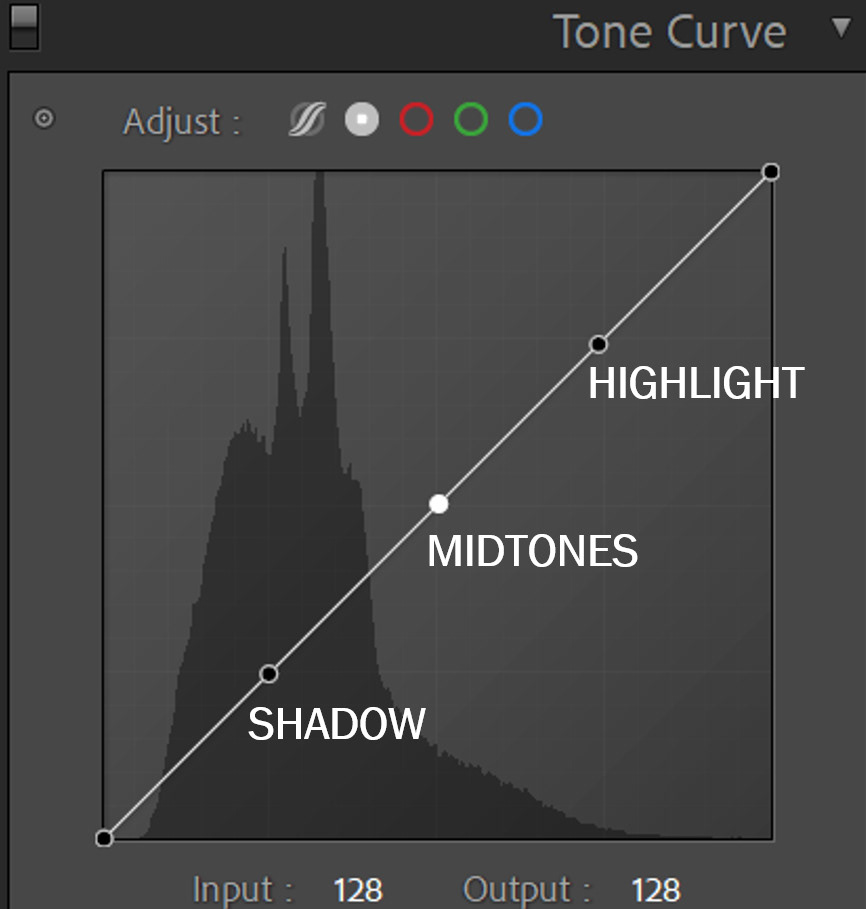
First, let's look at the Tone Curve in Adobe Lightroom. From the diagram below, upper right corner is the Highlight, which is the brighter area in the photo. In the middle we have Midtones, which fall between Highlight and Shadow. Left bottom will be the Shadow which is the darker area.
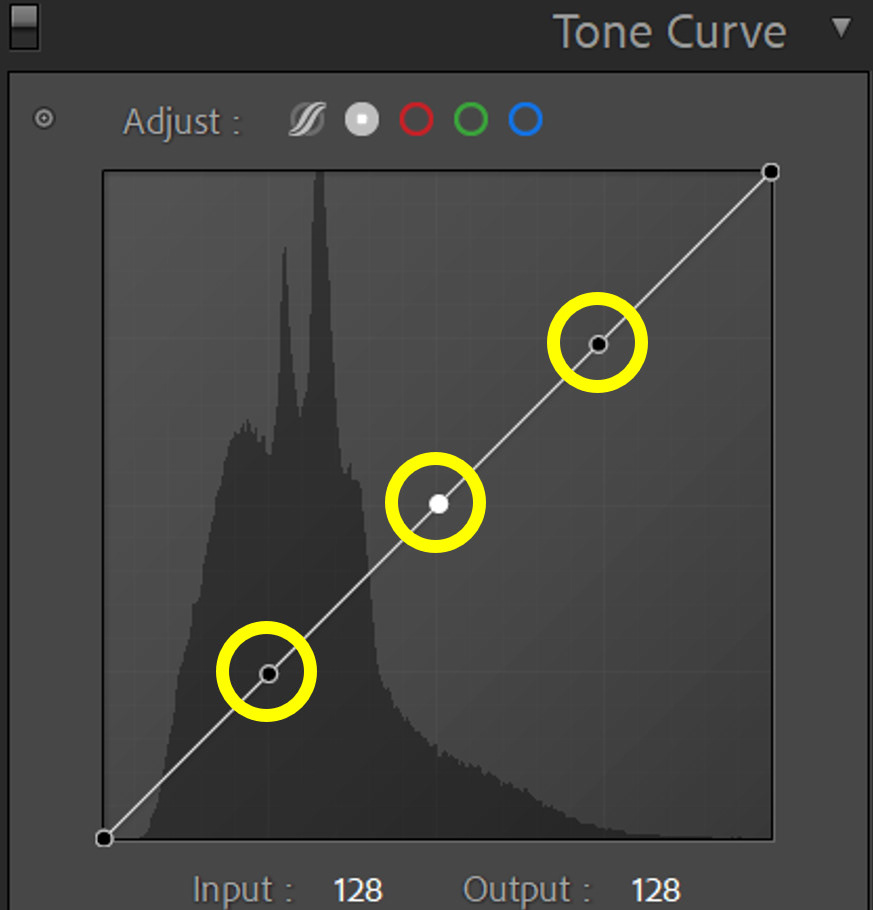
The very first step is to select each area. Click on the Tone Curve line and select once on each Shadow, Midtones and Highlight.
#Tips: To be able to select without affecting or moving the Tone Curve, you can HOLD down SHIFT key and CLICK on the Tone Curve line.

Once you have selected each area, let's start making adjustment.
HIGHLIGHT - Click on the dot and drag it upwards.
MIDTONES - Leave the dot in the middle.
SHADOW - Click on the dot and drag it downwards.
The level of adjustment on the Tone Curve depends on the photo or personal preference.
Below is a photo example that have applied ONLY S Curve (Left is BEFORE adjustment and Right is AFTER adjustment). We can see that the photo has increased in Contrast and Color Saturation!
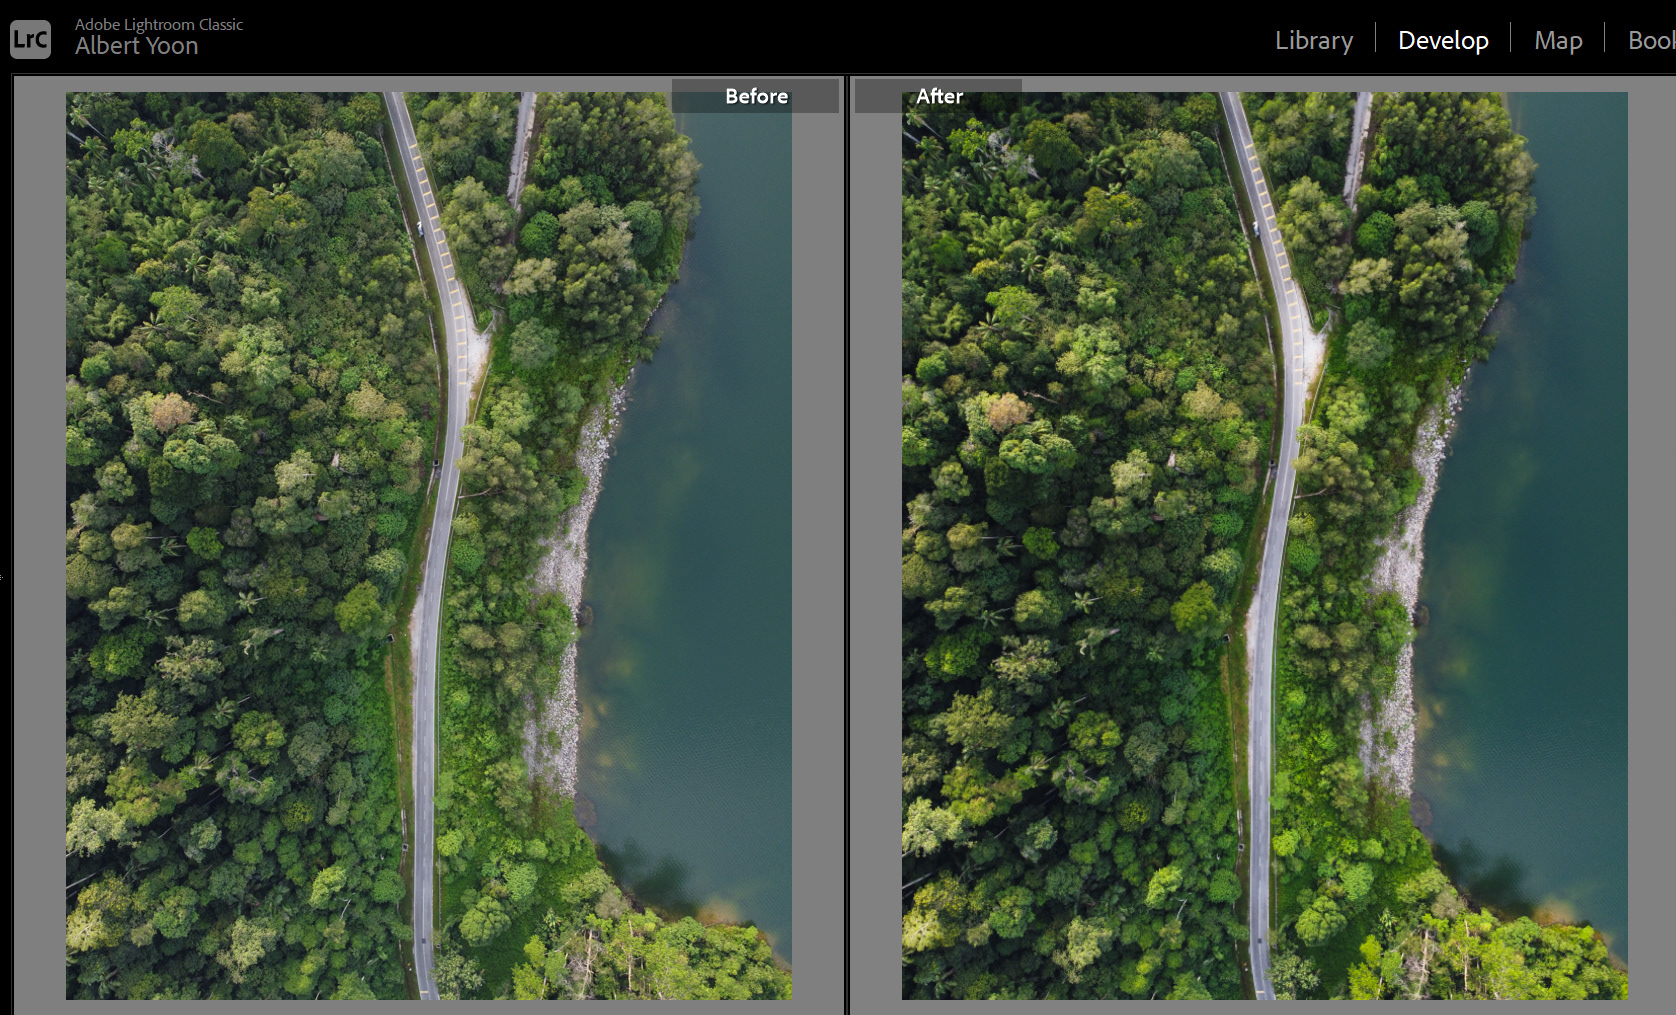
S-Curve works great when you have a flat and dull photo as it will make the photo pop.
It is always the first step of my photo editing process. Hope these tips can help you with your photo editing.
You can always visit my Instagram, DM me if you have any questions. Hit LIKES on my work, it means a lot to me!