Vignette is a great tool to draw the viewer attention towards the subject. Directing the viewer attention more towards the middle area of the photo.
There are many photo editing software that has Vignette Tools. In our case, we are using Adobe Lightroom.
We will use Black Vignette, what black vignette does is to darken the area around the photo while not affecting the middle area of the photo. It is an easy but powerful tool to have to help you with your photo editing.
In Lightroom, you could locate the Tools under Effects tab on the right-hand side when you are in Develop Module. In the Effects tab you will see Post-Crop Vignetting.
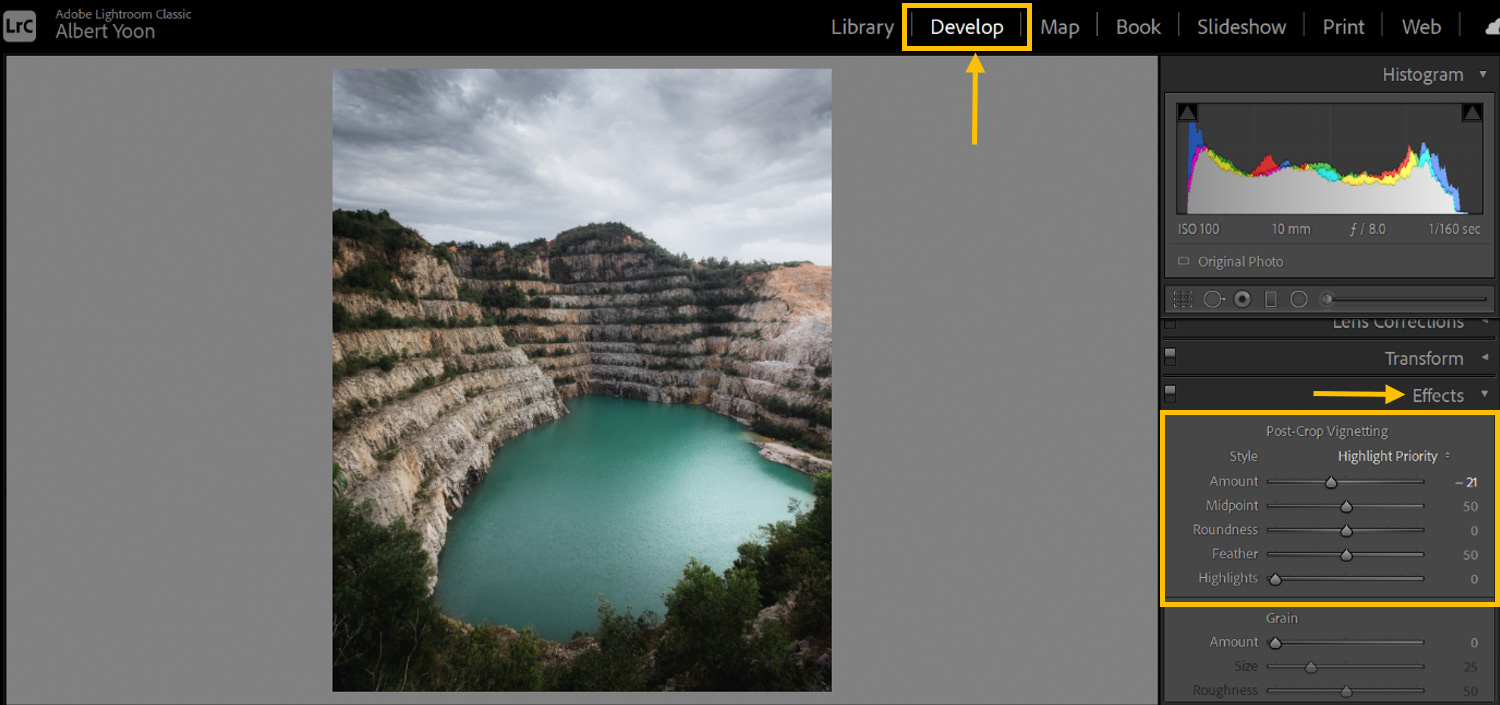
There are 5 sliders that you can adjust under Post-Crop Vignetting which is:-
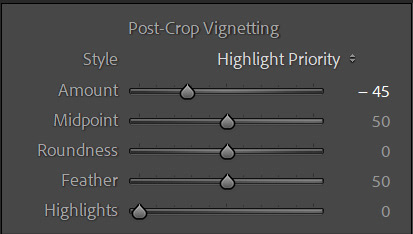
Amount; Allowing you to adjust amount of Black Vignette and White Vignette. Move the slider pin to the left will add the Black Vignette to your photo and to the right will add White Vignette.
Midpoint; Moving the slider pin to the left will increase the area of Vignette, which mean larger area around the photo will be darken (if you apply Black Vignette). While moving the pin to the right will decrease the area to be darken.
Roundness; This slider will affect the area shape of the Vignette effect, move the slider pin to the left will give you a squarer shape on the area of Vignette and move the slider pin to the right will give you a rounder shape on the area of Vignette. Keep the slider pin in the middle will be Oval Shape which is used most of the time as it gives the best look.
Feather; This slider will affect the transition from the Vignette area to non-affected area. Moving the slider pin to the left will results in a rough transition and you can clearly the shape of Vignette that you have apply and this is not the ideal case. While moving the slider pin to the right will give you the smoother transition and the shape of the Vignette is less obvious and thus making the photo looks much natural. Recommend keeping it on 50 or higher depends on your preference of course.
Highlights; Moving the slider pin to the Right will mask out the Highlight area of the Vignette area which we will be able the retain the Highlights around the photo especially if we want to retain the bright area of the sky. The more you move the Slider to the Right, the more visible the bright area (Highlights) around the Vignette area.
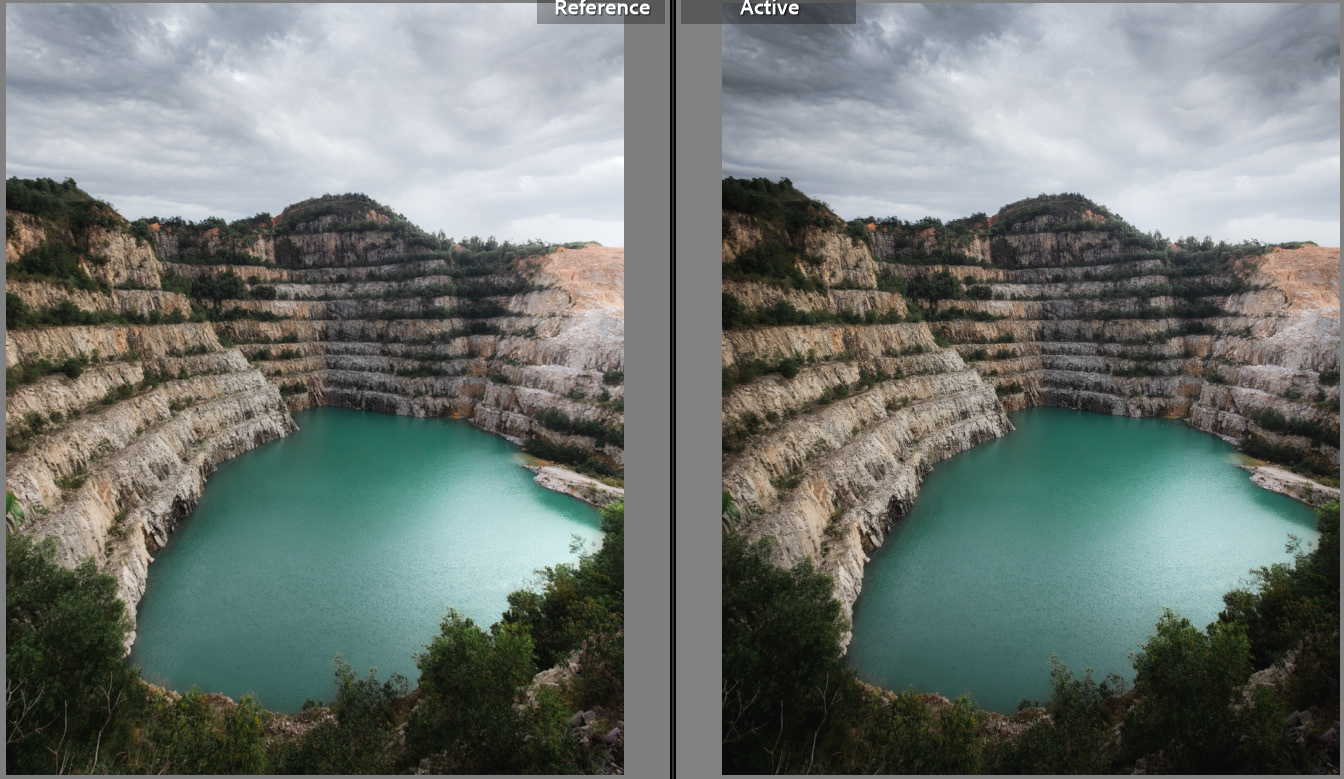
Now, let’s head to the photo example to show you how photo will look like with and without Vignette effect.
The photo on the Left is the photo without Vignette. The overall photo looks fine and bright. While the photo on the Right is after we applied Vignette effect. The only slider used was “Amount” where the slider was on about -45. The Vignette effect darken the area around the photo and our focus immediately drawn to the center of the photo. It also does add dramatic moods to the photo.
Go ahead and try the Vignette effect with your photo, it is best to try it yourself to see how it can improve your photo!
Hope this little tip on Vignette effect helps you! If you haven’t seen the tips on S-Curve, please do check it out (here), it is an extremely useful technique!